Monday, November 8, 2010

Father Christmas Doll


I had a great deal of fun making this Father Christmas doll, the third one I have made. Supplies include:
2 pipe cleaners
stuffing wool (I got it thorough Halcyon Yarn http://halcyonyarn.com/fibers/fiberswildwooly.html )
Red, green and golden felting wool (also through Halcyon and fiber festivals)
A small amount of colored wool for eyes and lips and face if you want a different skin tone than I have here.
I used washed, un-carded curly locks for the beard and hair- you can purchase wool doll hair or make it yourself by braiding wool hanks and letting them set.
Needling pad or sponge
Needles.

The first thing to do is take two pipe cleaners- one for the head and arms, the other for the bodice, and bend them, as below:

This gives you a form to work with and some flexibility in the arms later. Next, I wrapped the arms in stuffing wool and needled it into place (light needling at this point allows you to make changes later). I then stuffed the head from one side- the smooth front becomes the face, the back is later covered by hair:
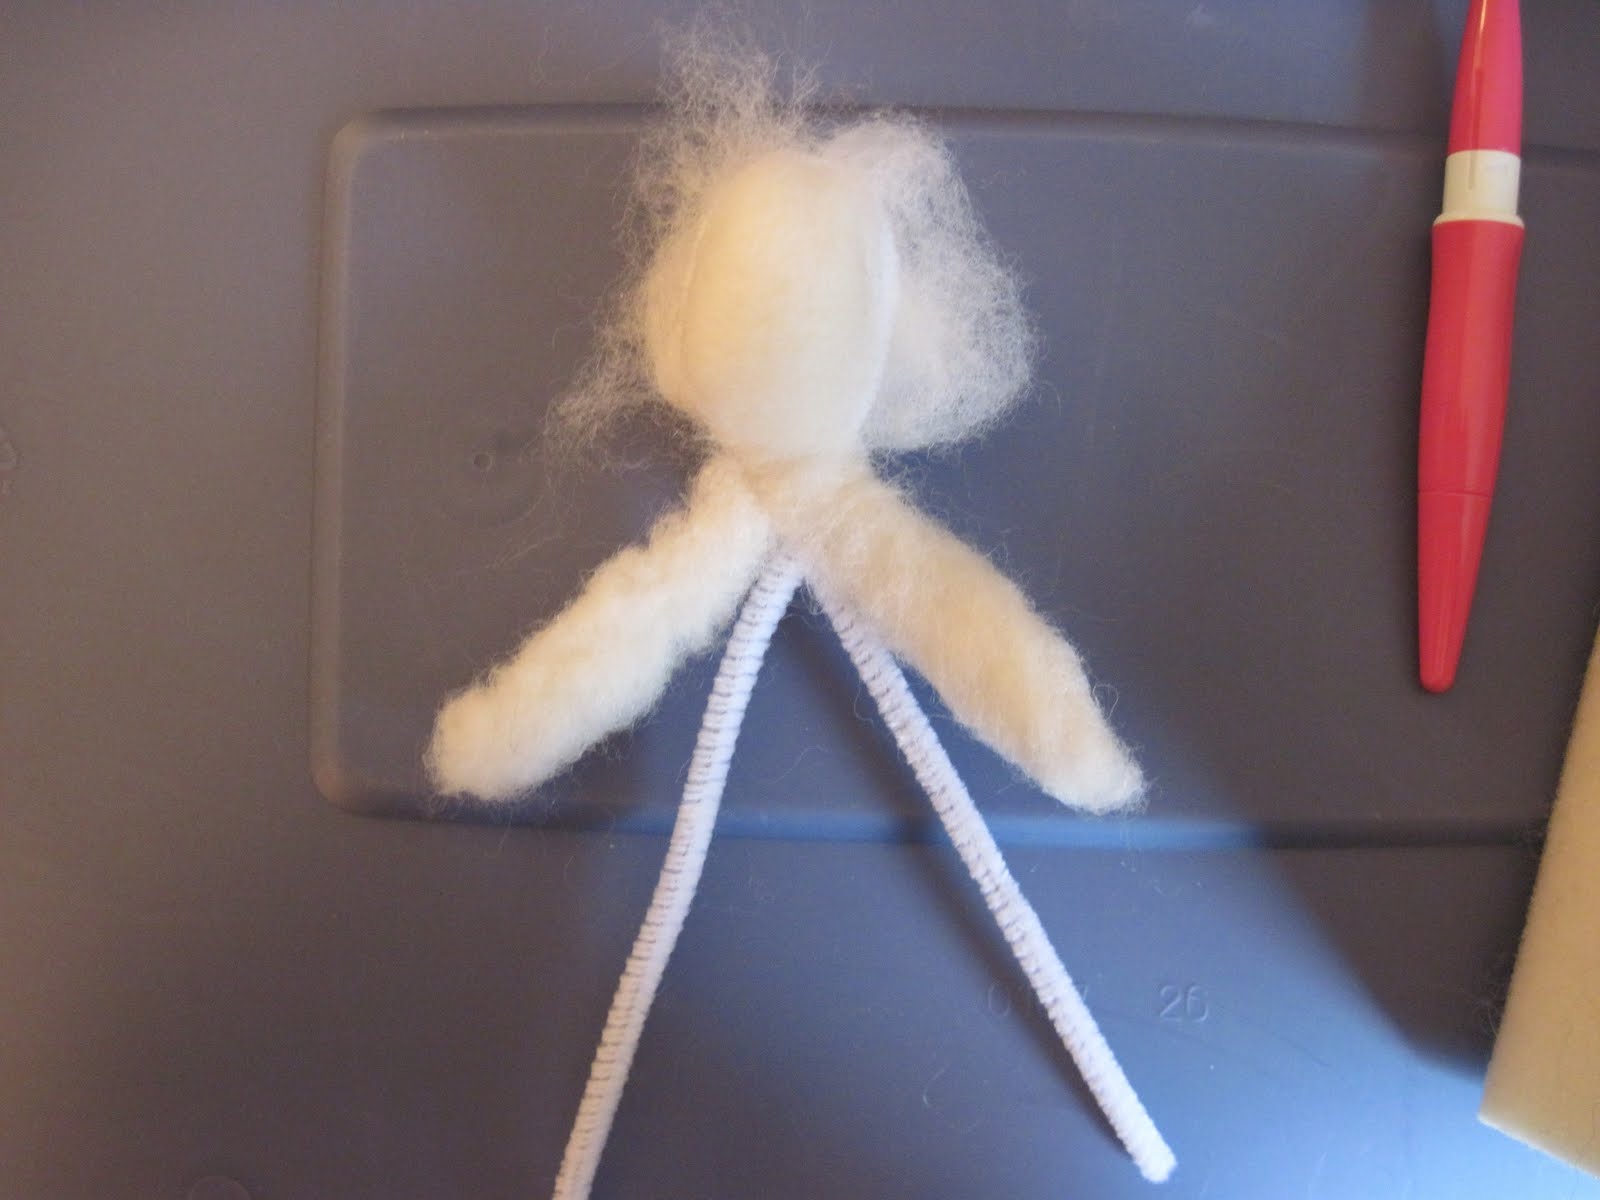
Next I took a small hank of wool and needled it in the center to build up a nose. This takes some practice, so try a few times (and use tan or brown or whatever color wool for different skin tones on the face and "hands." When I have made darker skin tone dolls, I have set the eyes off in a white background so they can be easily seen):
I then needled the whole thing into place on the face:
Next begin stuffing the body- this is where you need a firm conviction that it will eventually look like something, not an amorphous blob!
Continue to needle the wool to get it tighter and firmer, adding wool as necessary. Needle from the bottom too, to "lock in" the core wool at the base- here it is firming up:
Begin to add colored wool. The red is a Christmas red, and the green is a forest green, but it appears darker on these photos than it really is:
I took some red wool and made a small poinsettia, adding the yellow accents (these are the true flowers of the poinsettia- the red are modified leaves, called bracts) (you will see later where I add this to F. Christmases robe):
I took a hank of red wool and needled it flat, into a rectangle. Then I folded it into a cone and trimmed it and needled the back seam from the inside to make a cone-shaped hat. Here it is being needled to Fa. Christmases head...oh and I added some facial features and later straightened his nose:
I made a small sack for toys and a wrapped present to put in it (honestly, this is red, not pink):

Then I needled on the hair and beard, folded the hat down, added some holly and assembled my Father Christmas!

Till next time, I'll be needlin' around!

Tuesday, June 8, 2010

Little knitted bags


Little Knitted Bags
Another kind of "needlin' around" I do is knitting, especially when it is hot out and handling wool and wool felt does not seem like a fun idea. Here are some simple knitted bags I made, using less than a skein of Clover "Peaches and Cream" 100% cotton yarn. You need some very basic knitting skills and need to be able to use a crochet hook (casting on and off, knitting with some nice stitch that you like)(and I know about basic skills- I am no knitting expert, just a dabbler).

These bags are easy and are sort of free form. Decide the depth of the bag you want and double the number of rows- these are small- I am going to fill them with little homemade soaps or candies for Christmas gifts this year. I used a half-linen stitch- it makes a lovely pattern and is fun and easy to do (I do not like the "Dummies" books because of their titles, but "Knitting for Dummies" is pretty good for beginners). I knitted rows that were between 33 and 51 stitches wide (half-linen stitch requires an odd number of stitches). When it was done and I cast off, I crocheted a simple chain-stitch ruffle around the edges in a contrasting color. I folded the knitting in half and used a tapestry needle to stitch each side together with the Clover yarn. I made some sort of handle or clasp, using a ribbon, a knitted swatch or a macrame rope- a braid will do too. Find a cool button for a closure, sew it on and voila, you are done! Quick and fun and you can use up odd bits of yarn that we all have laying around! (note- do not use a stretchy yarn-that's why I used the Clover cotton. Regarding the needle to yarn ratio- use smaller needles than you might otherwise, so that the knitting is a little tight-I used Takumi 10 bamboo circulars, though even smaller might work better).
Till next time, I'll be needlin' around!

Tuesday, May 11, 2010

One fish, two fish


I made a second fish to go with the first. I started with a form cut from wool felt (above) though you can also shape and needle loose wool. Next, I added padding wool on each side (below).
I left the fin and tail area flatter than the body and separately needle felted some blue fins and tail and needled them onto the fish.
I added a layer of color to the body:
..and a lighter color for the belly (working back and forth from side to side). Time for eyes..
Adding the fishing line...
and voila, a companion to the first fish, complete with eyes, eye spots and gill slits!
Happy Birthday to my friend J!
Till next time, I'll be needlin' around!

Wednesday, April 21, 2010

Felted fish

Needle-Felted Fish
I have a friend who likes to go fishing, so, for her birthday, I am making some needle-felted fish (I don't think she is reading this blog!). The basic process is to first cut out a fish shape from some wool felt (you can fashion and needle a handful of wool into a fish shape as an alternative).

I then built up each side with some stuffing wool, lightly needled it into place, and added some variegated gray wool:
Next, I began to work in details with colored wool, using three, two, then one needle, as the parts got smaller:
Lastly, I added some dyed, curly locks for fun, needle felted a string into the "mouth" (you can also sew it in or work it in much earlier in the process) and tied the string to a pole. I hope to make a few of these to put in a coffee cup or glass!
Till next time, I will be needlin' around!(PS Garden season has started, so I am busy, and needle felting has a season, too, for me, fall and winter, so I will continue to add posts, but they should pick up substantially in the fall!)

Tuesday, March 9, 2010

Project 2: Felt pillow

Using the same techniques as in the felted card, but on a larger scale, I needle felted this pillow (though still have yet to stuff it). I free lanced on the design, knowing I wanted a wild vine in a somewhat circular form overall. There are a few other differences from the felted card- this design has more shading (on the vines) and I used dyed, curly Merino locks to add the yellow curves to the center flower. I have only ever seen these for sale at fiber festivals-they add a bit of fun, and dimension, to your work. The next step is to stitch this into a pillow and stuff it. I probably will not use wool for the backing- it is expensive and pillows need to have one non-wool side, in case the wool feels itchy to you. I will probably use fleece. Hum..I might add a few vines too...
Till next time I'll be needlin' around!

Monday, March 8, 2010

Beginner's Project: A Felted Card

This is an easy beginner's project, a needle-felted card. Before you start, be warned that these needles are wickedly sharp and are barbed. It is easy to poke yourself and to poke right though a fingernail into the nail bed below (I know from painful experience). If a needle breaks, it can fling into your eye so be careful. Always carefully discard any broken needles and pieces. (Needle felt at you own risk). This is a not a craft for small children. Move your hand and fingers away from the felting to protect yourself.
First assemble your materials. I used some pre-made card stock, wool fabric and colored, carded wools. You do not need to use a wool fabric for a base. I have used cotton and linen, and you can use other fabrics as well, as long as they are not too densely woven or stiff (your needles may get stuck or break). Cut out the dimension of fabric you want to use- I make the wool top the same size as the card stock, but you can use a smaller piece or a strip to nice effect.
Next, loosely arrange the colored wool on top of the the base fabric, which sits on the needling foam or brush. I made a loose purple heart shape. You can add wool as needed to change the shape of the design.
Next, being needling. Take your needle tool and plunge it right through the colored wool into the base below. Use steady, even stokes and always plunge straight down, perpendicular to your project (this helps prevent needles from breaking). Loosely lock down the wool. You will do a more thorough locking later. Loosely locking it makes it easier to move and reposition the colored wool if you make a mistake or want to change your design.
I usually add several colors of wool for accent...
...and a contrasting border. I now use my light green 5 needle holder to firmly lock down the wool. Glue it to the card and voila!
Till I write again, I'll be needlin' around!

Friday, March 5, 2010

Tools of the Trade


I have pictured above some of the tools I use in needle felting- NOT all of them are necessary! The necessary items include needles and holder, some wool and a sponge or pad to work on (your needle should go through your work to properly lock the wool, so you need something underneath to protect the work surface and prevent the needles from breaking). In addition to colored wools, white stuffing wool for three-dimensional objects and a wool batt (felted fabric) you can see:
1. A pink, pen-style needle holder that hold 3 needles. This is the tool I use most often. Needles can be removed for more fine work.
2. Near it, a green and beige needle holder that holds 5 needles. I use this for working larger areas and for locking down final work. (You can get needle holders made of metal or wool, holding more or fewer needles).
3. A somewhat worn needling foam and something that looks like a pale green clothes or shoe brush (the latter near the yellow wool)- these are both used under your work to protect the work surface/needles.
4. Scissors to trim fibers you cannot lock in (I generally pull and tear my wool to get the size piece I want and rarely cut the fibers, unless they are very long) and cut batts, etc.
5. Wooden-handled hand carders- you do not need these unless you get addicted and start buying raw wool to clean and process yourself. I just put then in the photo for fun!
I also included a bag of dyed curly locks (I think they are merino) that are fun to use to add dimension or for doll or animal hair/fur, but are not necessary.
Next time, a beginners project! Until then, I'll be needlin' around!

Tuesday, March 2, 2010

What is Needle Felting?


Whenever I say "I do needle felting" to friends and acquaintances, even fellow crafters, I most often get a blank stare. "Is that like knitting?" "Oh, that's that crewel thing, right?' "Does it involve sewing?" All guesses, none correct. Needle felting is using a special, sharp barbed needle (or several at a time in a holder) to make designs with colored wool, or to make three-dimensional objects. It takes advantage of a property of wool fibers, that is, to lock together when poked with this special needle. There is another kind of felting, called wet felting, which involves this same locking quality of wool, but is done through the use of water, soap and mild pressure with a felting stone. Felt can also be made solely by pressure and is one of the oldest fabrics know to man....

It all started innocently enough, when my sister in law gave me a piece of felted wool fabric called a batt. I brought the batt to a fiber festival (yes, they exist) and got very quick instructions from a kind, but busy, vendor on how to make a design using colored wool. I bought materials from her and other vendors and my first attempt is pictured above.

What I intend to do with this time-limited blog is to give you some instruction and ideas in needle felting (and, from time to time, other crafts). Some basic skill at drawing is helpful for some projects, but not necessary. It is not a difficult craft, it is lots of fun and it is not expensive. So, till next time, I'll be needlin' around!